Dynamic Supply Demand Zone indicator for MultiCharts
The Dynamic Supply & Demand Zone indicator for MultiCharts automatically identifies and displays active supply and demand zones directly on…
Dynamic Supply Demand Zone indicator for MT5: Precision Liquidity Mapping
The Dynamic Supply & Demand Zone indicator for MT5 (MetaTrader 5) automatically identifies and displays active supply and demand zones…
Sierra Chart Dynamic Supply & Demand Zones indicator: High-Performance Liquidity Analytics
The Dynamic Supply & Demand Zone study for Sierra Chart automatically identifies and plots active institutional supply and demand zones…
Dynamic Supply Demand Zone indicator for MultiCharts x.NET
The Dynamic Supply & Demand Zone indicator for MultiCharts .NET (x.NET) automatically identifies and displays active supply and demand zones…
Dynamic Supply Demand Zone indicator for Ctrader: Institutional Order-Flow Engine
The Dynamic Supply & Demand Zone indicator for cTrader automatically identifies and displays active supply and demand zones directly on…
Elimination of Redundancy: How to Avoid Duplicate Signals in Automated Strategies
In the world of automated trading, “signal duplication” is a silent killer of equity curves. It occurs when a trading…
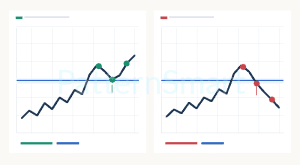
How to Detect the First Bar of a New Signal
How to Detect the First Bar of a New Signal In trading indicator development, detecting the first bar of a…
Master the Trend: How to Use Moving Averages Correctly in Strategy Code
Moving Averages (MAs) are the bread and butter of technical analysis. Whether you are building a simple trend-following bot in…
Coding Precision: How to Eliminate False Crossover Signal Triggers
In algorithmic trading, the Moving Average Crossover is often the first strategy a developer codes. It’s conceptually simple: when a…